If you wish to import your clients from other applications or databases, this feature allows you to organize and import the data into LobbyPMS using an Excel file.
To perform the import, download the Excel template called Formato Clients that we have attached in this manual. Add the information for each column, considering the following:
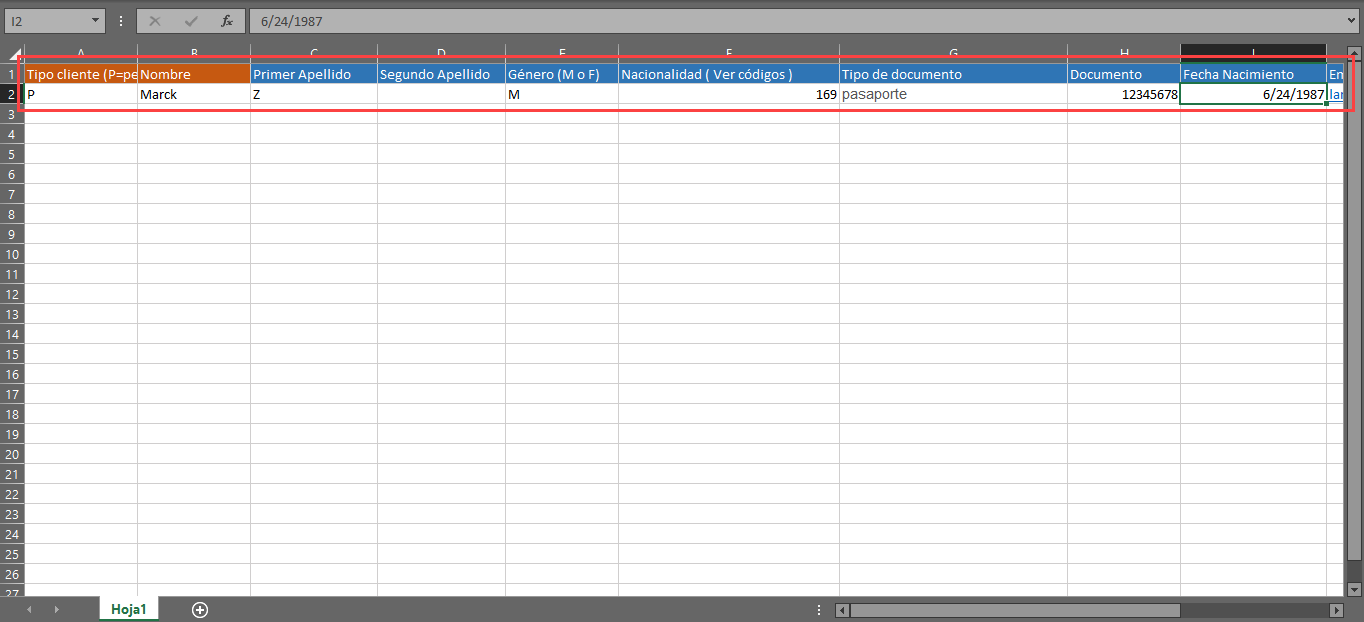
- Customer Type (P= Person, E= company)
- Name:Assign the name of the customer.This field is mandatory.
- First Last Name:Assign the first last name.
- Second Last Name:Assign the second last name, if applicable.
- Gender:Assign the customer's gender. You must use M for Male and F for Female in capital letters.
- Nationality:: To assign the nationality of your clients you must use the attached file Listado de paíseswhere you will find the exact name and code of each country.
Please type the name of the country as you find it in the document or the code directly.
- Document Type: Add the document type exactly the same as the name that appears in the document configuration of your property in LobbyPMS. See the instructions to configure the document type, here Configuraciones para gestión de reservas y check in
Or view the document types created in your LobbyPMS account by following the path Menú > Settings > Reservations and Check In
- Document: Type the customer's document number without periods or commas. If it is a passport, then type the letters in capital letters as found on the official document.
- Date of Birth: The format for the date of birth to be recorded must be MM/DD/AAAA. It is mandatory to use the “forward slash” to separate the date.;
- Email: Add the customer's email. This must be a valid email format. Example: cliente@correo.com
- Phone: Enter the phone number without symbols such as "+".
- Address: Assign the address provided by the customer. There is no defined format, but it is recommended to use only numbers and letters.
- Occupation: The customer's occupation.
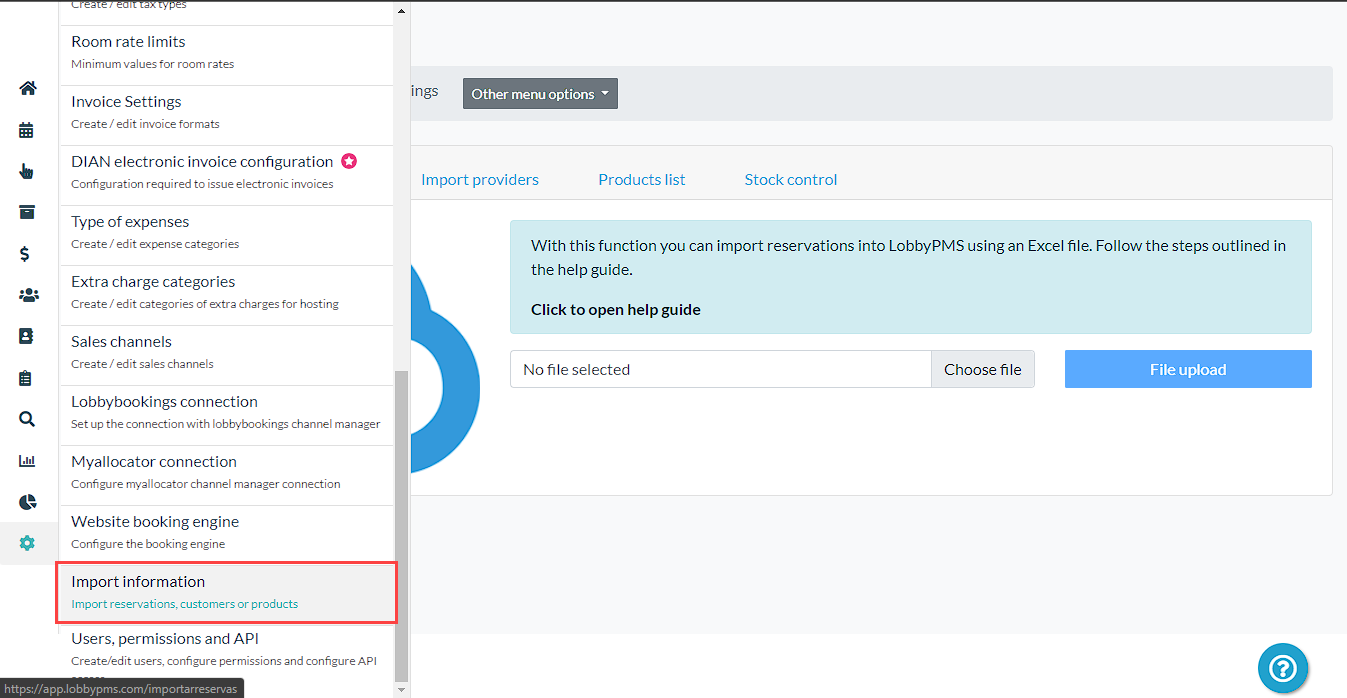
Once you have completed all the information in the Excel file, import the information by accessing: Menu > Settings > Import Information > Import Clients.
Click on select file and then click on upload.
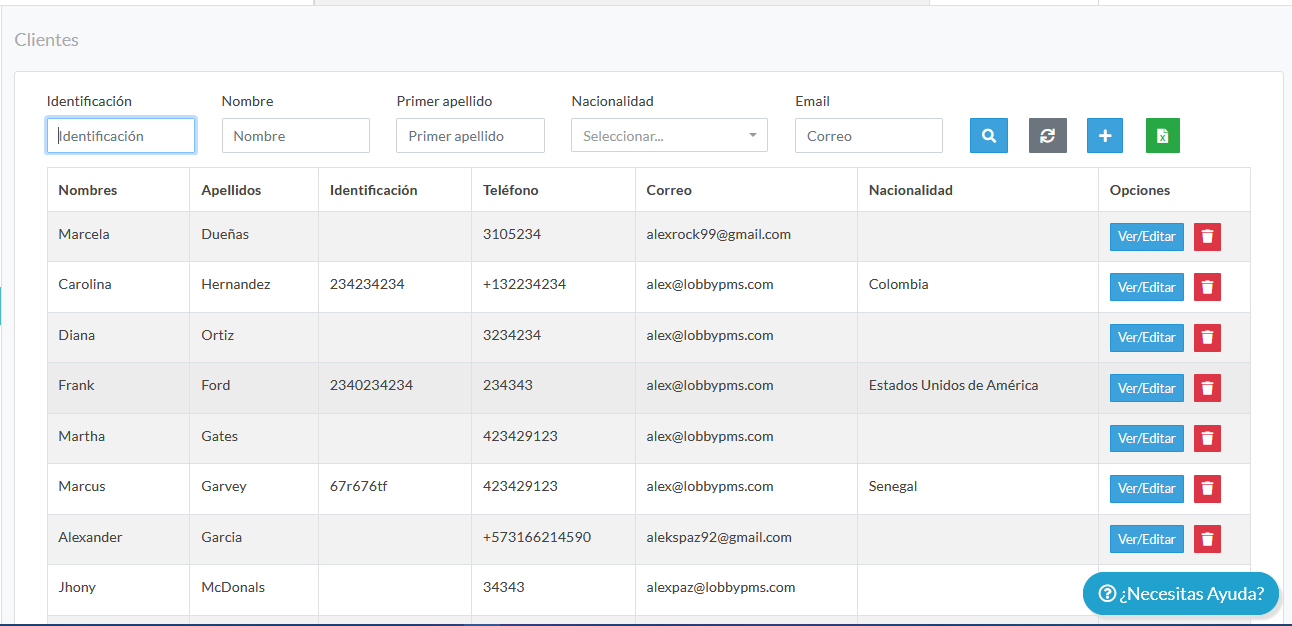
You are done! You can consult your customer database by accessing Menu > Customers where you can even edit the information for each one.
Comments
0 comments