For the email notifications that lobbypms sends to your customers you can use default templates included in the platform or you can configure your own templates with custom designs for your property. Here's how it works.
Default templates
The system has a default design for all emails that will be sent to your customers. There are three types of notifications that are sent with this default layout: Notification of reservations, notification of check out done and notification with the invitation to check in online.
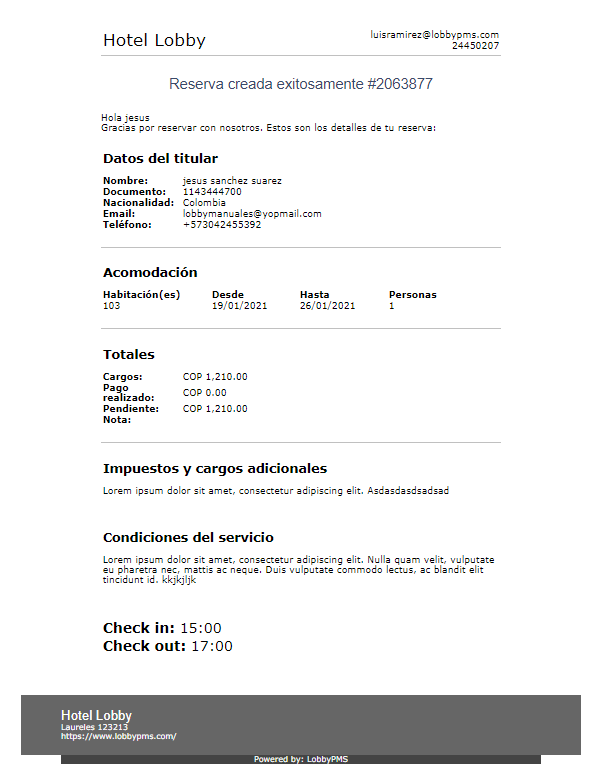
- Reservation notification
This email is sent every time a booking is created or cancelled from the booking engine or when you press the “Send email” button from the booking management interface. The layout is as shown below:
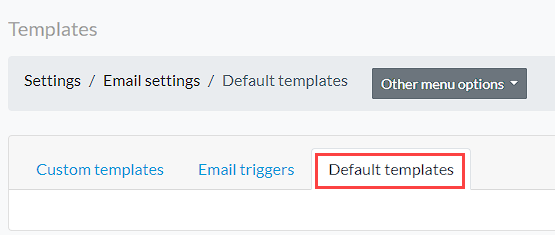
For the case of notifications to confirm check out and to invite to check-in online, it is necessary to perform the message configuration. The path to do this is: Menu > Settings > Emails.
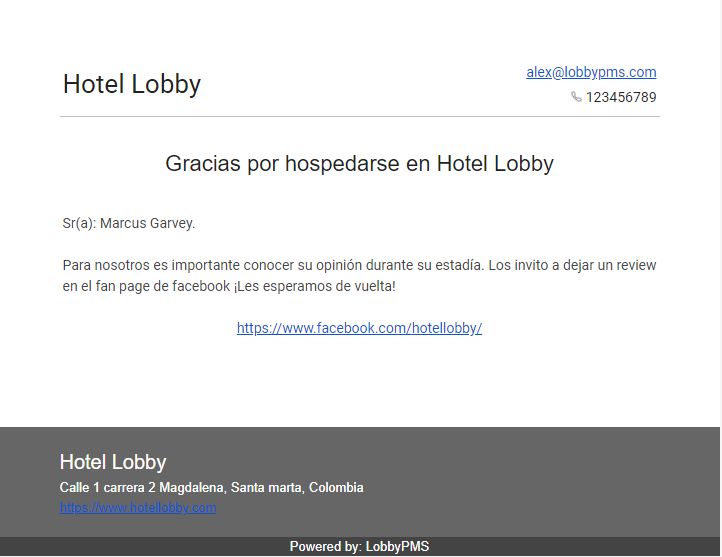
- Notification for check out
This block allows you to configure a message confirming the end of the customer's stay. It is recommended to write a thank you message and share a link to a customer service survey or an invitation to leave a review on platforms such as TripAdvisor or Google My Business.
Example of check out notification:
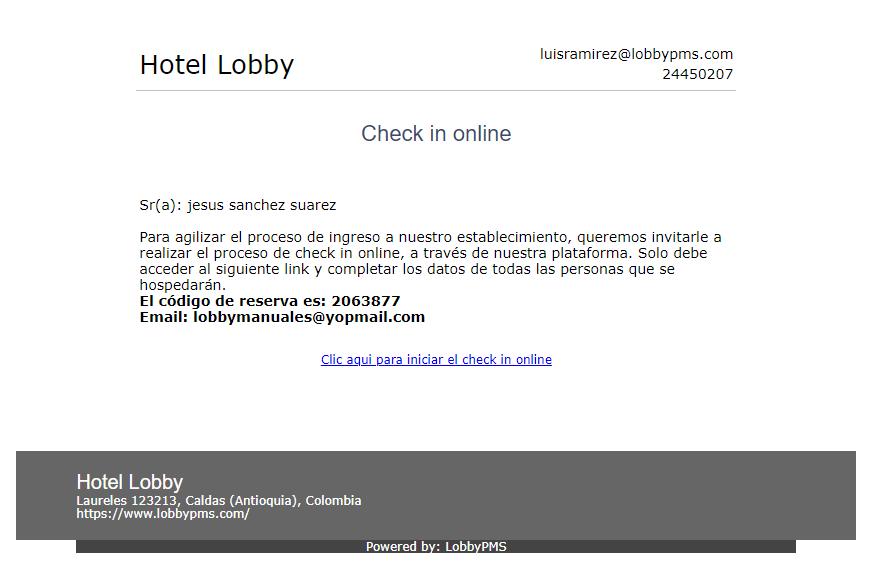
- Notification to invite to check-in online.
This block will be used to send an invitation message to your customers, so that they check in before arriving at the establishment, saving time and avoiding direct contact with the reception staff.
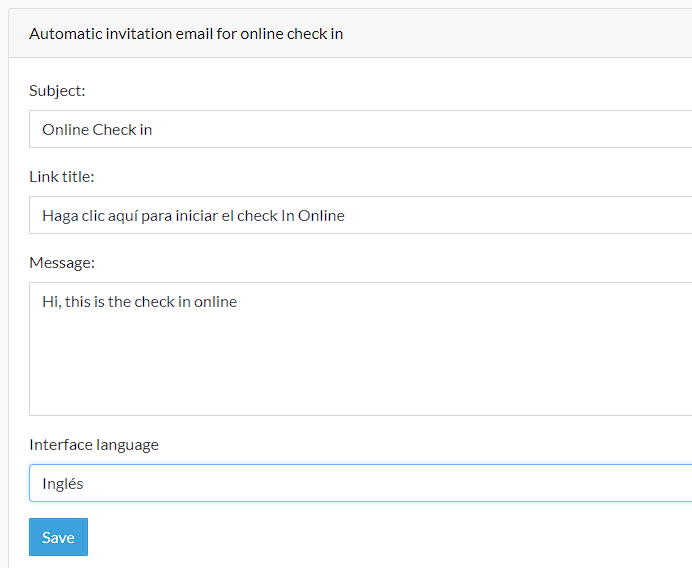
Example of notification with invitation to check in online:
Customized templates
If your needs are more advanced, Lobbypms allows you to configure your own email design using plain text or HTML templates. To do this, you will first need to create the templates and then assign them for each of the notification types.
Templates using plain text:
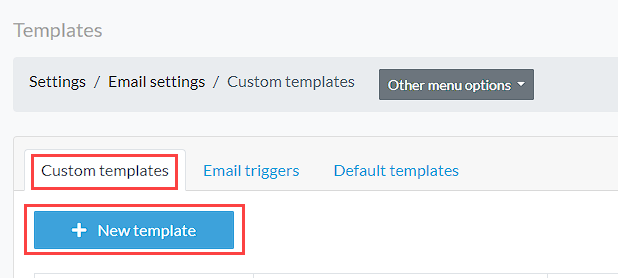
Let's start with the Custom templates tab: to create a new template, enter the Custom Templates option and then click on New Template.
- In this interface we must assign a name to the template, the description to identify its use, the sender that in this case should be the name of the business and the subject to send the mail. For the design of the message, you will be able to use all the system variables highlighted in the blue box:
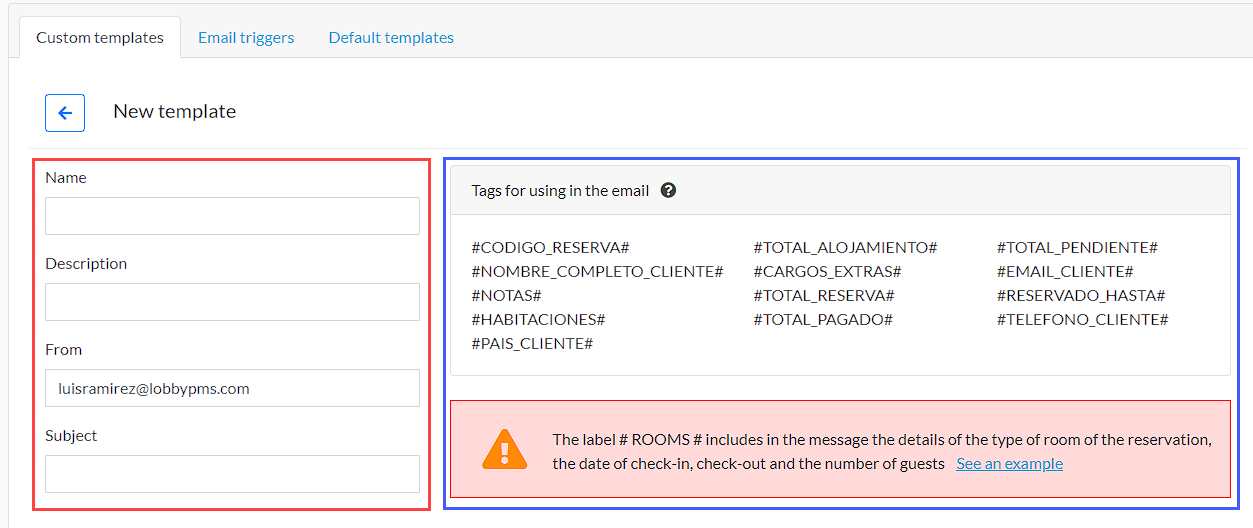
The variables or tags are very useful to insert relevant information about the reservation in the email that is sent to the customer.
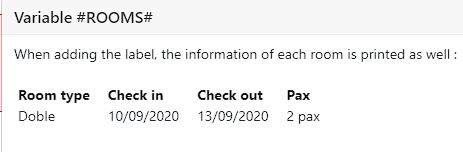
- The #HABITACIONES# tag allows you to print in the email details of the type of room booked, the check-in date, check-out date and the number of guests.
- The #RESERVADO_HASTA# tag allows you to print the automatic deletion date of the reservation when it is a provisional reservation.
- The #NOTAS# tag allows printing the notes/comments added by the customer at the time of booking.
This example shows the creation of a basic template by adding the desired text and the required tags to print the reservation information. Use the gray button with the little eye to preview your template.
- When you complete your templates, you must assign them to the type of notification you want. In the Assign Templates tab, you will find 8 types of notifications for which templates can be assigned. Example: Booking confirmation email or Check-out confirmation email.

- If you select the option “Manual template selection in booking confirmation” this allows you to manually choose a template each time you need to send a booking notification.
Example of a booking confirmation with manual selection selected:
And now let's see an example of an email with a custom template with plain text:
Templates using HTML: Use your HTML templates to set up notifications in LobbyPMS.
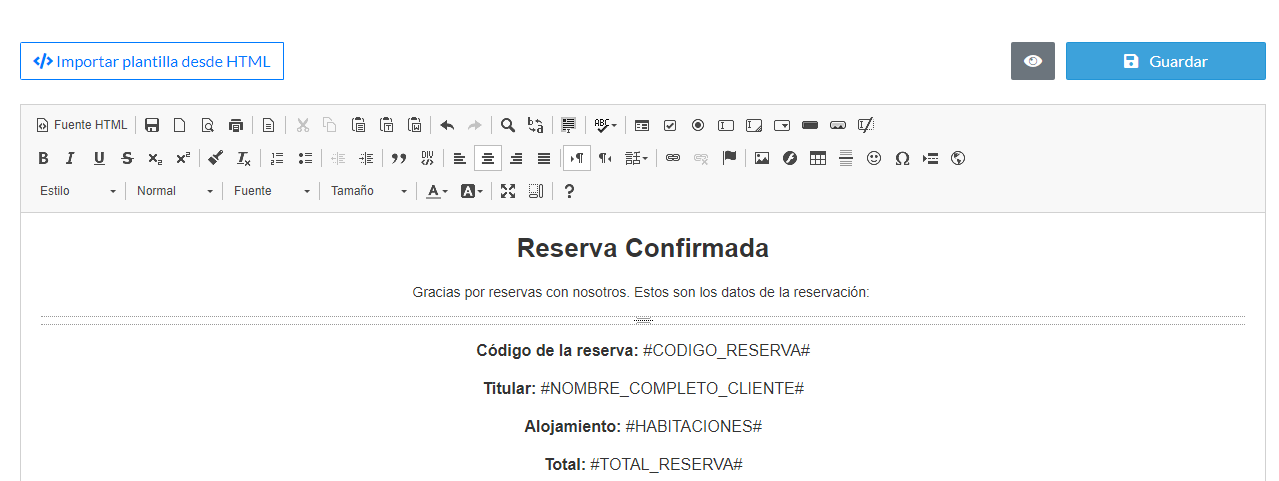
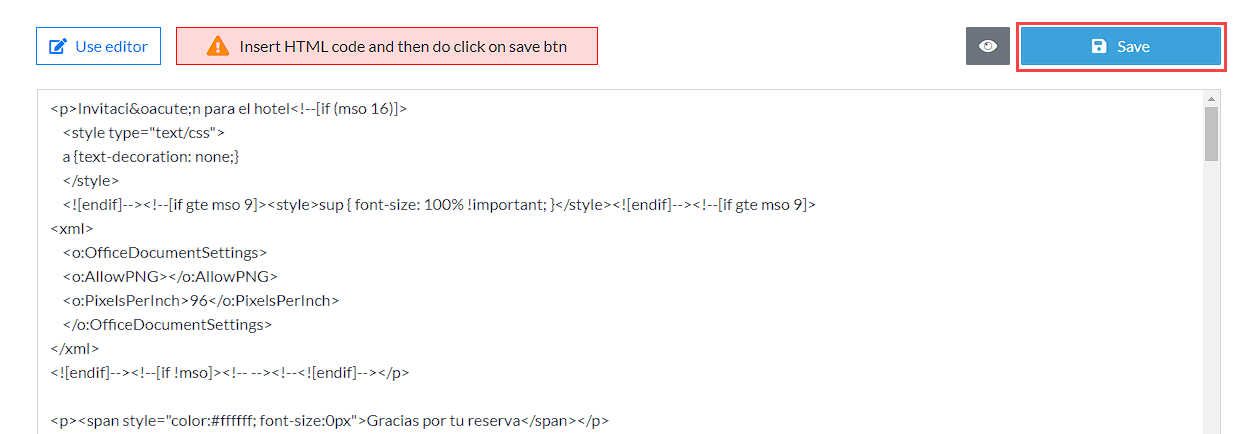
- When creating a new template, click on the “Import template from HTML” button. Then copy and paste all the HTML code from your template without editing anything. Before saving, use the preview button and verify that the design works. If you need to edit the template, you must edit the HTML in the file directly and then re-import the code.

- When saving the template, use the Email triggers tab to enable the notifications you require.
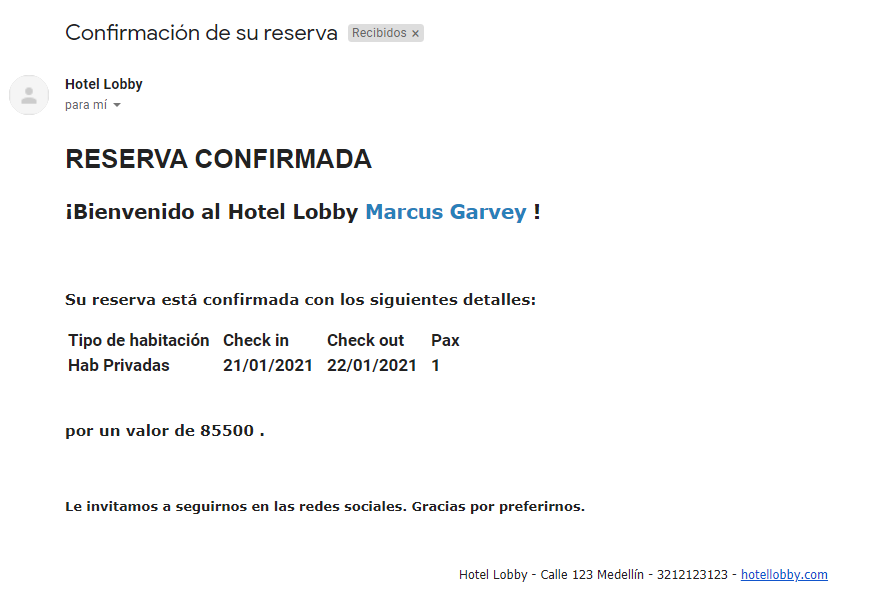
This is an example of an email with a custom HTML template:

Comments
0 comments